Creating a Gmail filter
Gmail filters allow you to keep your inbox in order by automatically labeling, marking as read, deleting, forwarding, and doing lots of other fun things to emails that match certain patterns. Follow…

Updated
by Waqar Ahsan
Gmail filters allow you to keep your inbox in order by automatically labeling, marking as read, deleting, forwarding, and doing lots of other fun things to emails that match certain patterns. Follow the steps below to set up a filter.
- Search for an email of the type you want to filter (e.g., an invoice, a receipt, an approval request, etc.) and click the filter icon to the right of the search bar. Alternatively, you can select the meatball menu (three dots) at the top right of any email and select Filter messages like this.
- Next, you need to decide on what information will be the most useful when setting up the filter. This information must be consistent so that future emails of the same type continue to be filtered. On the other hand, you want it to be unique enough so that you don’t accidentally forward an incorrect email. The combination of the sender email address and a consistent portion of the subject line is usually a reliable filter.
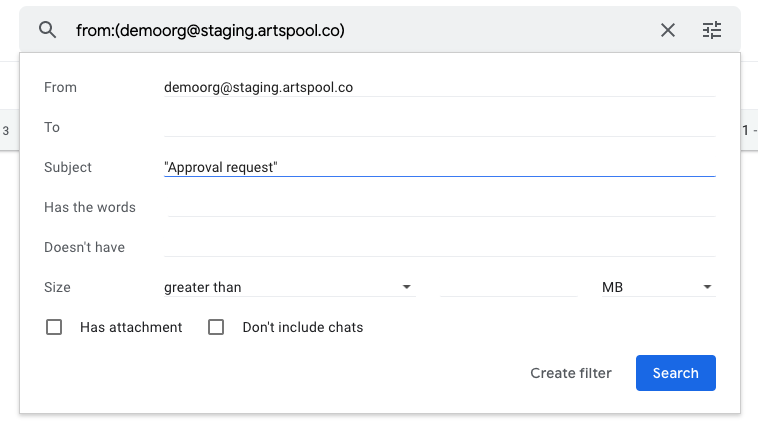
- If you have filters with similar subject lines but need to be processed differently based on the email body content, you can also add keywords or phrases from the email body in the Has the words field. It's best to put key phrases in quotes to maximize accuracy.
- Click Search to test your filter logic. You should see search results that match the email you are trying to filter. If you notice a lot of unrelated emails, you may need to refine your filter.
- Click the Filter icon to the right of the search bar to return to your filter settings. Adjust your settings if needed, then click Create filter.
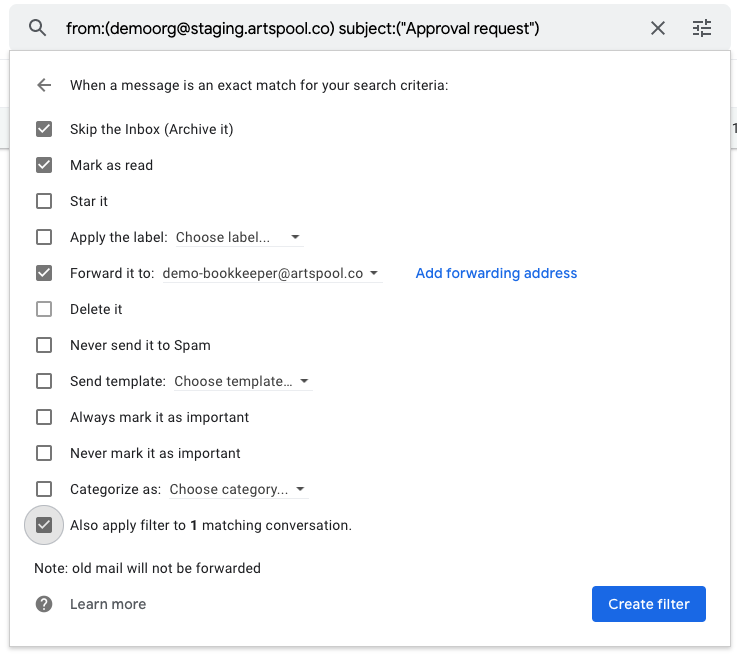
- The next screen will have several options for actions to take on the emails that match the filter criteria. For example, in addition to forwarding to a specific email address, you can also skip the inbox, mark the email as read, and apply a label to the email so it is automatically archived without any manual work. You can also select the option at the bottom to apply the filter to existing emails that match the filter criteria. Once you have confirmed the options you want, click Create filter.
Once your filter is created, it is a good idea to monitor it regularly to make sure it is working properly. Changes in the content of an email (e.g., if a vendor updates the subject line) can cause filters to break.
How did we do?
Submit tasks at lightning speed with email templates
Adding a forwarding address to Gmail