Table of Contents
Importing passwords into 1Password
Preparing the import file. 1Password allows you to import a comma-separated value file (CSV) to bulk enter passwords. For login type entries, the order of columns in the CSV should be as follows: tit…

Preparing the import file
1Password allows you to import a comma-separated value file (CSV) to bulk enter passwords. For login type entries, the order of columns in the CSV should be as follows:
title | website | username | password | notes | custom field 1 | custom field 2 | custom field … |
Your file should not have a header row when you import it, but it's helpful to keep the header row in place while preparing the file so that it's easier to work on the data. Once you have your data organized, delete the header row and save the file.
To help disambiguate similar passwords for different companies, make sure that each item in the Title column has the company name appended to it with a hyphen (e.g., "Verizon - Desert Island Theater Barn"). You can also do this manually after import, but it's faster to do in a spreadsheet with a formula.
But wait, there's a catch: spreadsheets software will often strip out the leading zero of cells by default because it treats every cell as a number. With OpenOffice you can get around this by selecting "Quoted fields as text" in the Other Options of the import dialog box the pops up when you first open the file. Other spreadsheet software may offer similar functionality when opening a CSV file.
For more detailed information see the guide Move your data into your account on 1Password.com. For general information on importing into 1Password, as well as instructions for importing from other password managers, see the guide Move your data from other applications to 1Password.
Importing into 1Password
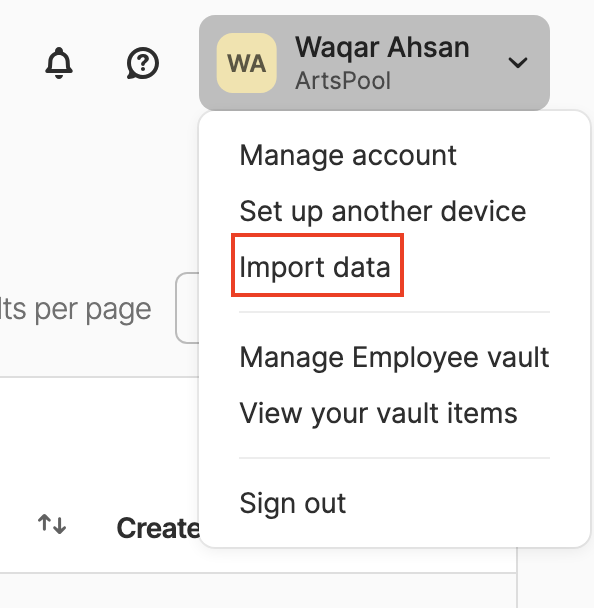
- Click your user name in the top menu and select Import data.
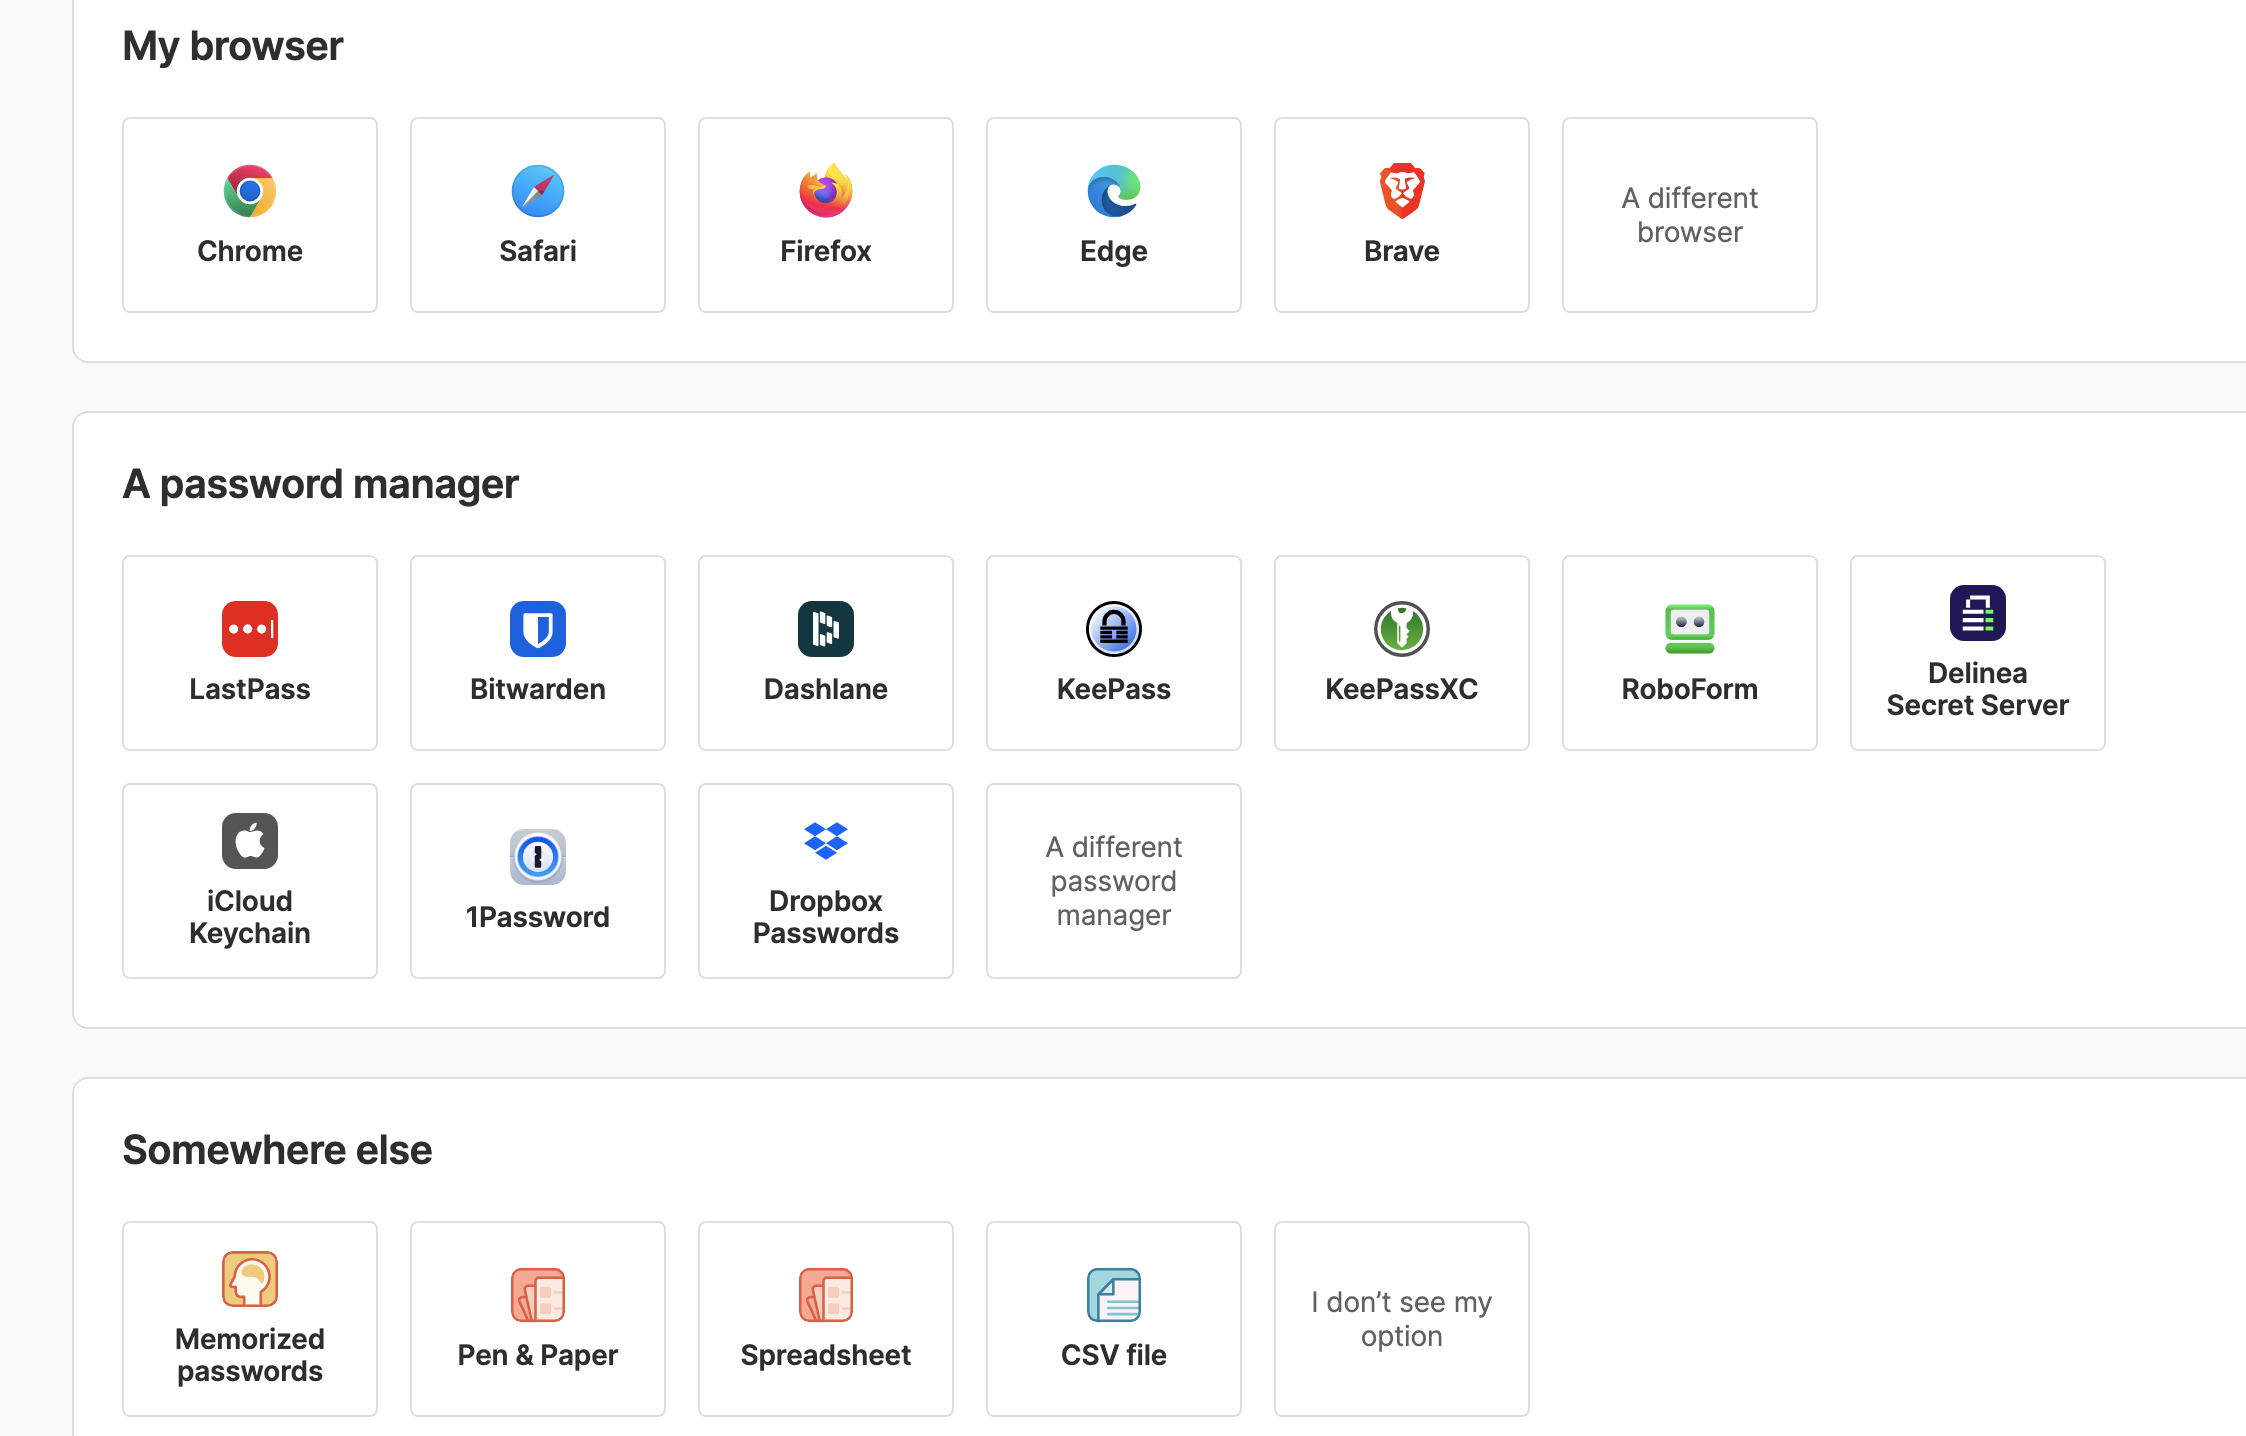
- On the Import page, select one of the A different/I don't see... options if importing from a source that is not on the list. Otherwise, select the appropriate source.
- For the option selected, 1Password will take you through the Import process.
- You will be asked to select the vault into which you want to import passwords. For personal passwords that do not need to be shared, select the private Employee vault.
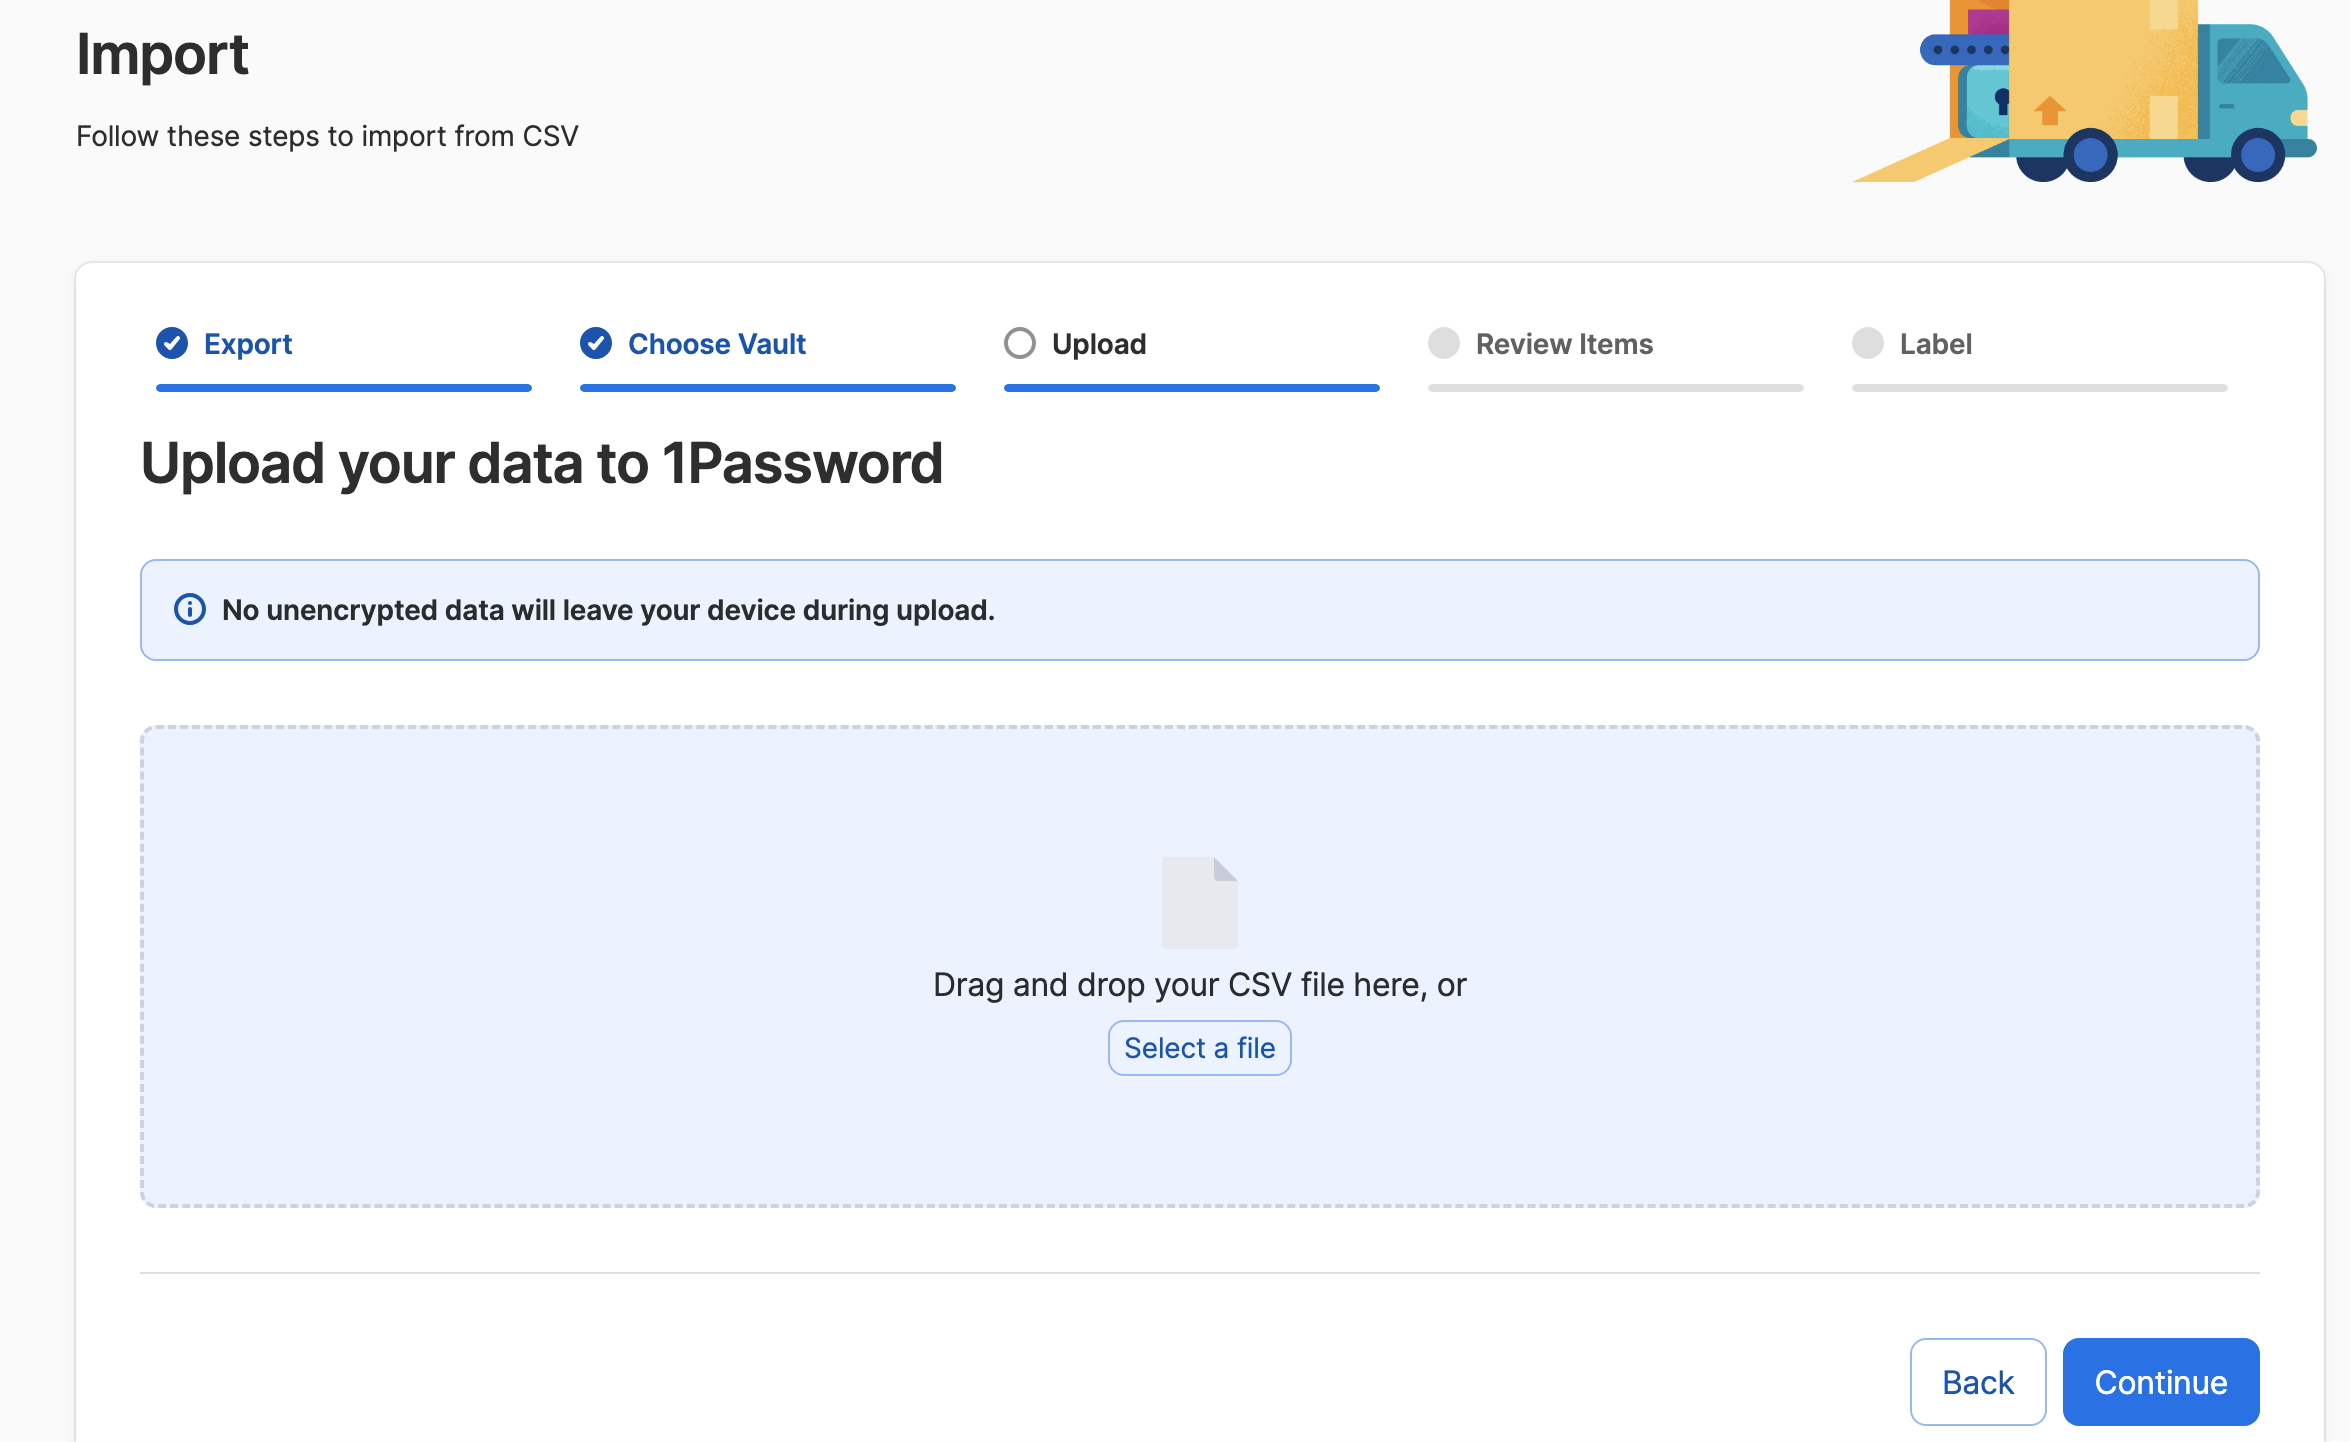
- Drag the CSV file you prepared into the upload area and click Continue.
- Review the items to be imported and then click Continue. The default item type is Login, but you can change it to other item types for specific credentials. Typically, keeping the default is sufficient.
- Click Add label at the top of each column and map it to the appropriate field in 1Password. For things like email addresses, select New label and name the label based on the type of data contained in the column.
- Click Continue when you are ready to complete the import.
- Review the imported entries. Add login URLs to any entries where the URL is missing. Clean up any weirdness that you see or flag entries for review with the member by tagging them with "review," "needs link" etc.
How did we do?
1Password basics
Artificial Intelligence (AI) Policy